January 4, 2014
Wallpaper Removal #4
This job was a wonderful transformation. We removed the wallpaper from the ceiling and walls from a 3rd floor hallway. As we were doing it, several areas of plaster simply came down with the paper. So, there was a lot of major repair involved here. Then we painted everything - ceiling, walls, baseboards, chair rail, spindles, and the entire 2nd floor, as well. Take a look at what we did. (I promise to bring my real camera next time. These iphone photos don't really do justice).
December 31, 2013
Painting of the Second Floor
This was a lovely house with some very nice people and skittish cats. The house was small and perfect for this couple, but not big enough for us to repair the entire thing at one time. So, we took over their second floor and the homeowners slept in their living room.
Again, I forgot my camera, so these are iPhone pictures. I hope they come across well here.
The first set is the bathroom. It was basically a cleaning of the walls. We painted the ceiling, walls, trim, door, and shelving all the same color.
| Bathroom Before |
| Bathroom After |
| Shelving Before |
| Shelving After |
| Bedroom 1 Before |
| Bedroom 1 After |
| Bedroom 2 Closet Before |
| Bedroom 2 Closet After |
December 19, 2013
Excellence
I got notice today that Barry Bush Home Improvements won the Angie's List 2013 Super Service Award for drywall and interior painting. This marks the 6th year in a row for awards in these categories. Only the top 5% of companies in the Philadelphia area get this award.
September 3, 2013
The Painting of an Entire House #8
I haven't been updating this blog lately. It's not that we have not been working. I've actually been working very hard and have been behind schedule all summer. Many of the jobs we've done are not interesting enough to show here or they do not have a story. I don't think posting color changes here will really be interesting. I also need to remember my camera more often.
This was my first collaboration with Greensaw Building and Design. They had the contact to strip the kitchen to the brick and act as the general contractor for the rehab of this house. They had the electricity rewired, floors refinished, and hired me and my team to repair and paint the interior of the house.
After the electricians did their thing, the ceilings and walls were in really bad shape. The colors of the rooms were rather drab and dirty, as well. Here are pictures of the house when we first found it compared to our fine work.
The living room had a large channel torn out by the electricians. We installed new 1/4" drywall over the entire thing and painted the room.
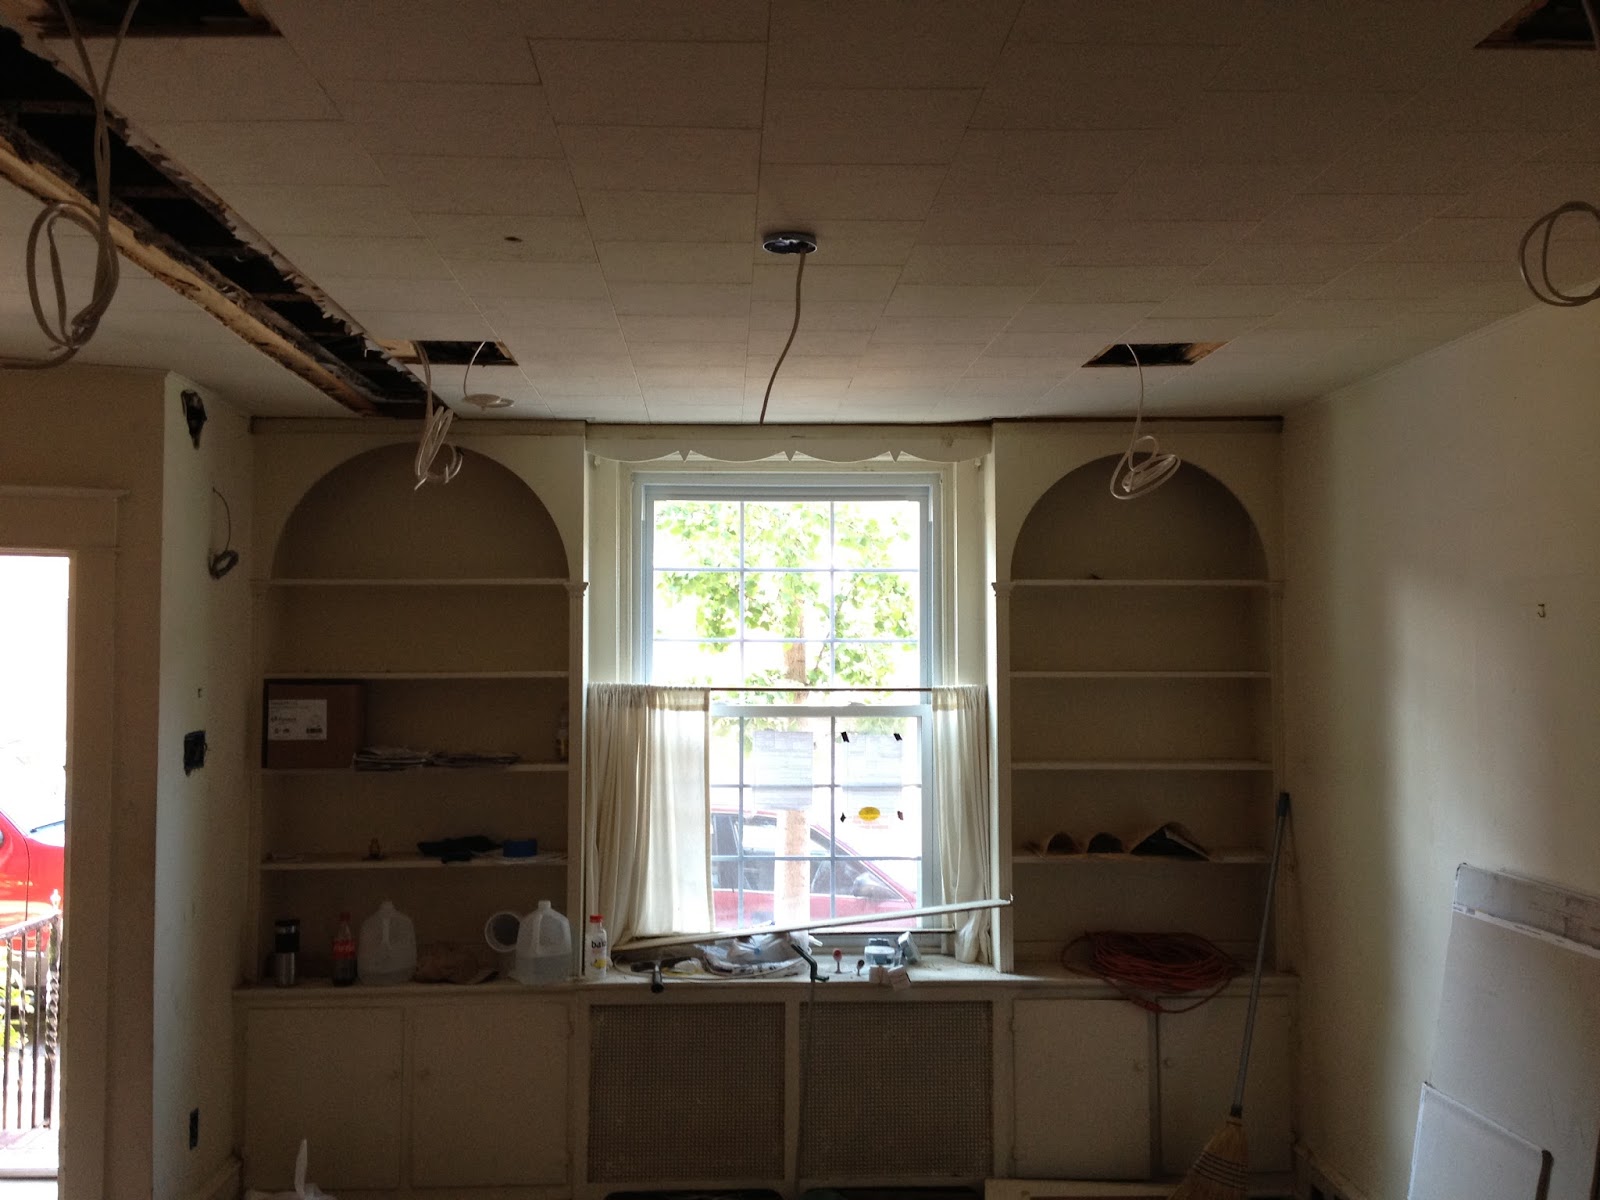
On the other side of the living room, they had some since built-in bookshelves. We did some repairs and gave it some life.
I have photos of 2 of the 3 bedrooms. They were rather pale, dirty, and littered with holes made by the electricians. We repaired and painted everything.
Following are the before and after pictures of the hallway.
Finally, here are the pictures of the custom kitchen. We installed the drywall to the studs, repaired and painted the rest of the house while Greensaw built it, and then we painted it when they were done. Sorry, I neglected to take pictures of the empty room before we installed the drywall.
This project was my first of (hopefully) many collaborations with Greensaw Design and Build. They are a great group of designers and project managers. I enjoyed working with them on this project, and we did a great job on this house.
This was my first collaboration with Greensaw Building and Design. They had the contact to strip the kitchen to the brick and act as the general contractor for the rehab of this house. They had the electricity rewired, floors refinished, and hired me and my team to repair and paint the interior of the house.
After the electricians did their thing, the ceilings and walls were in really bad shape. The colors of the rooms were rather drab and dirty, as well. Here are pictures of the house when we first found it compared to our fine work.
The living room had a large channel torn out by the electricians. We installed new 1/4" drywall over the entire thing and painted the room.
| Living Room Before |
| Living Room After |
| Living Room Bookshelves Before |
| Bookshelves after |
I have photos of 2 of the 3 bedrooms. They were rather pale, dirty, and littered with holes made by the electricians. We repaired and painted everything.
Following are the before and after pictures of the hallway.
Finally, here are the pictures of the custom kitchen. We installed the drywall to the studs, repaired and painted the rest of the house while Greensaw built it, and then we painted it when they were done. Sorry, I neglected to take pictures of the empty room before we installed the drywall.
This project was my first of (hopefully) many collaborations with Greensaw Design and Build. They are a great group of designers and project managers. I enjoyed working with them on this project, and we did a great job on this house.
May 23, 2013
Wallpaper Removal #3 with A Cleaning #5
This is the 3rd time I was called to work in this house. The last one was A Cleaning #2. Every time we work in this house, I feel that we bring it back to good health. The wallpaper was put up very poorly and the room were in general bad condition. I found out this time that the homeowners are getting ready to sell the house and are slowly fixing it up. We are doing our part to help them.
I didn't take many pictures and these are the best that I can show. The existing wallpaper in the dining room and living room were falling off and everything looked gloomy. We stripped the wallpaper, repaired the old plaster walls, primed and painted the walls, painted the ceilings, and gave the trim a bath of fresh paint.
| Dining Room before |
| Dining Room after |
| Living Room and Stairwell before |
| Living Room and Stairwell after |
March 24, 2013
A Crowning Example of What We Can Do
The couple that bought this condo unit rented the unit just below it. I met them in their rented apartment and saw a circus of colors in every room. The trim was painted with 3 colors which was different in every room. It was an interesting concept that was applied too heavily. So, when they bought the unit upstairs from them, they asked me to do something similar. Their idea was much simpler and coordinated. I could tell more of a story here, but the pictures speak for themselves.
Following are 3 photos of the foyer:
Following is 1 photo of the dining room as we found it and 3 photos of what we did to it:
The living room was also painted with this kind of detail. I only have one before and after picture, but it is the most impressive of the room:
The rest of the condo was simply repaired and painted. I have those photos here, too:
This job is a crowning example of what my crew and I can do. The pictures don't truly do justice to what was done, but this was the most difficult trim job that we have ever done. The homeowners are extremely pleased with the work and thanked us repeatedly.
Following are 3 photos of the foyer:
| Foyer Before 1 |
| Foyer After 1 |
| Foyer Before 2 (with homeowner's color test samples) |
| Foyer After 2 |
| Foyer After 3 |
| Foyer Before 3 |
Following is 1 photo of the dining room as we found it and 3 photos of what we did to it:
The living room was also painted with this kind of detail. I only have one before and after picture, but it is the most impressive of the room:
The rest of the condo was simply repaired and painted. I have those photos here, too:
| Breakfast Room Before |
| Breakfast Room After |
| Bathroom Before |
| Bathroom After |
| Bedroom Before (with homeowner's color sample) |
| Bedroom After |
Subscribe to:
Posts (Atom)