May 8, 2014

Deep Space and Chalkboard


I worked for this family a long time ago.  I did some work on their front door and painted the two rooms on their 3rd floor.  This time, they wanted me to paint their 2nd floor.

Some people contact me and just want their house painted.  They really don't know what they want, what colors to use, or how to create a space.  This is fine.  Not everyone is good at it.  This woman, however, had a vision and did not compromise it at all.

Her son's room was scuffed up, the baseboard was missing in some places, there were nail holes all over the ceiling and walls, and it needed some new life.  She showed me a picture from a design website and wanted what she saw.  So, we made the ceiling and the top 2/3 of the wall one off-white color.  We covered the bottom portion of the wall with chalkboard paint, even the closet.  She did not necessarily want her son drawing on the walls.  She just liked the look and the durability of it.  I had the chalkboard paint color matched for the trim.  So, the door frames were the same color as the chalkboard paint, but in a standard semi-gloss product.  We made the line go right over the trim.


Before

After
Her bedroom was a huge project.  We stripped the wall paper from the ceiling and made extensive repairs to it.  Then we painted the walls in Benjamin Moore's Deep Space with a Matte finish.  The trim and doors were also Deep Space, but in a semi-gloss. Considering the name, I was not shocked by the color.  I was shocked that someone would want it, though.  The ceiling was the same color as her son's room.  I did not understand it at first, but I do like the results.


Before
After


Before
After


Kitchen Makeover

I know that is has been quite some time since I updated this site.  The winter was filled with rather uninteresting jobs.  I patched a lot of holes due to water and ice damage, painted several rental units, and simply forgot to take pictures of the other jobs.  Now, that my busy season is starting up, I am engaged in more interesting projects and can get photos worthy of updating this blog.

The people in this house did not want a full upgrade of their kitchen, but needed to clean it up and make it look nicer.  The walls had a lot of texture (which you cannot see in the pictures) and were rather dirty from years of use.  Beautiful, old, hand-made built-in cabinets were also rather worn, and the hinges were caked with paint. The homeowners wanted it clean and nice.

Here are some pictures of the kitchen as it was when we got there


After repairing and skim coating the walls, painting the ceiling, stripping the cabinet hardware, and painting the cabinets and trim, the kitchen looked wonderful, bright, and clean.


January 4, 2014

Wallpaper Removal #4

This job was a wonderful transformation.  We removed the wallpaper from the ceiling and walls from a 3rd floor hallway.  As we were doing it, several areas of plaster simply came down with the paper.  So, there was a lot of major repair involved here.  Then we painted everything - ceiling, walls, baseboards, chair rail, spindles, and the entire 2nd floor, as well.  Take a look at what we did.  (I promise to bring my real camera next time.  These iphone photos don't really do justice).


December 31, 2013

Painting of the Second Floor


This was a lovely house with some very nice people and skittish cats.  The house was small and perfect for this couple, but not big enough for us to repair the entire thing at one time.  So, we took over their second floor and the homeowners slept in their living room. 

Again, I forgot my camera, so these are iPhone pictures.  I hope they come across well here.

The first set is the bathroom.  It was basically a cleaning of the walls.  We painted the ceiling, walls, trim, door, and shelving all the same color.

Bathroom Before
Bathroom After
 The shelving was painted in a very odd, almost incomplete fashion.  We made everything uniform.

Shelving Before
Shelving After
We changed their bedroom from yellow to a rich blue while repairing some drywall issues.

Bedroom 1 Before
 
Bedroom 1 After
The ceiling and the trim in the second bedroom was faux painted with a sponge.  There was also a significant amount of repair to do.  We made all of the repairs, changed the ceiling and trim to white, and changed the walls from red to yellow.  The photo does not do justice to the work that we did, but I think you can see the difference.


Bedroom 2 Before
Bedroom 2 After


The closet in the second bedroom had some water damage and did not even have a door.  There was also more faux painting there.  So, we cleaned it all up and added bi-fold doors.

Bedroom 2 Closet Before
Bedroom 2 Closet After


December 19, 2013

Excellence

I got notice today that Barry Bush Home Improvements won the Angie's List 2013 Super Service Award for drywall and interior painting.  This marks the 6th year in a row for awards in these  categories.  Only the top 5% of companies in the Philadelphia area get this award.

September 3, 2013

The Painting of an Entire House #8

I haven't been updating this blog lately.  It's not that we have not been working.  I've actually been working very hard and have been behind schedule all summer.  Many of the jobs we've done are not interesting enough to show here or they do not have a story.  I don't think posting color changes here will really be interesting. I also need to remember my camera more often.

This was my first collaboration with Greensaw Building and Design.  They had the contact to strip the kitchen to the brick and act as the general contractor for the rehab of this house.  They had the electricity rewired, floors refinished, and hired me and my team to repair and paint the interior of the house.

After the electricians did their thing, the ceilings and walls were in really bad shape.  The colors of the rooms were rather drab and dirty, as well.  Here are pictures of the house when we first found it compared to our fine work.

The living room had a large channel torn out by the electricians.  We installed new 1/4" drywall over the entire thing and painted the room.
Living Room Before
Living Room After

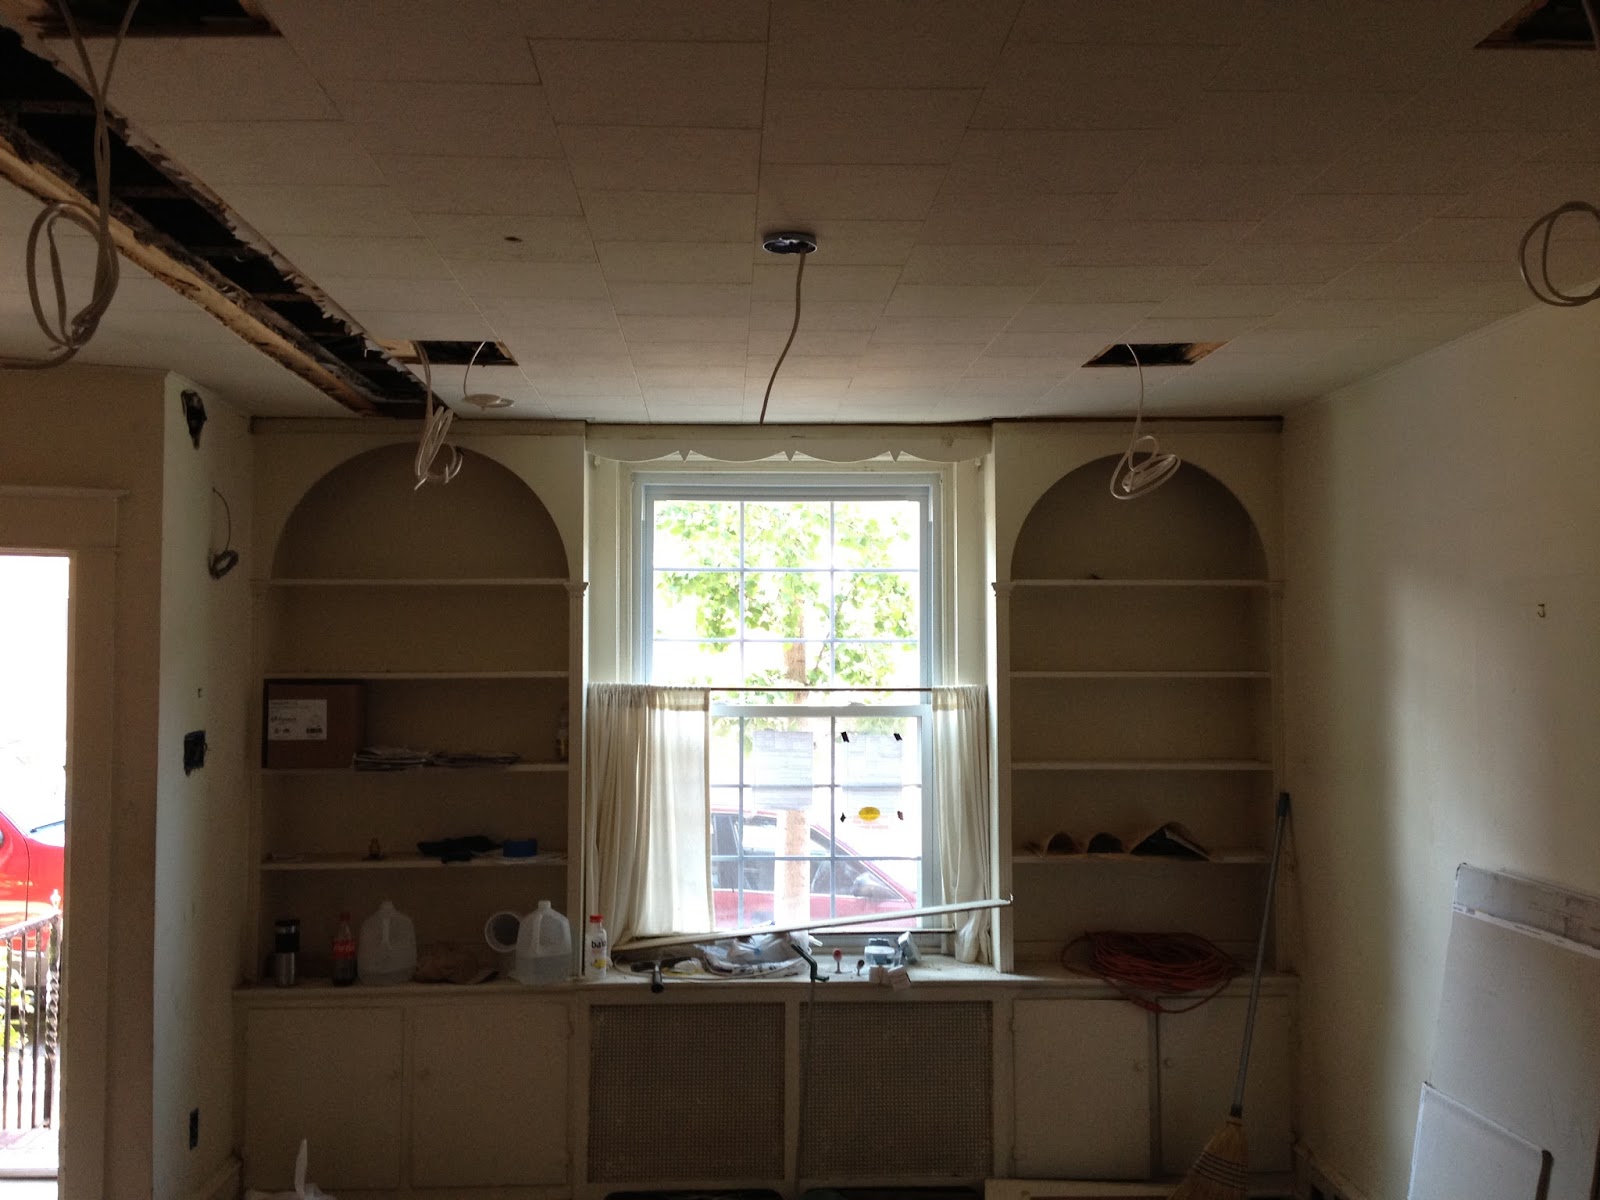
On the other side of the living room, they had some since built-in bookshelves.  We did some repairs and gave it some life.
Living Room Bookshelves Before

Bookshelves after


I have photos of 2 of the 3 bedrooms.  They were rather pale, dirty, and littered with holes made by the electricians.  We repaired and painted everything.


Following are the before and after pictures of the hallway. 


Finally, here are the pictures of the custom kitchen.  We installed the drywall to the studs, repaired and painted the rest of the house while Greensaw built it, and then we painted it when they were done.  Sorry, I neglected to take pictures of the empty room before we installed the drywall.


This project was my first of (hopefully) many collaborations with Greensaw Design and Build.  They are a great group of designers and project managers.  I enjoyed working with them on this project, and we did a great job on this house. 

May 23, 2013

Wallpaper Removal #3 with A Cleaning #5

 This is the 3rd time I was called to work in this house.  The last one was A Cleaning #2.  Every time we work in this house, I feel that we bring it back to good health.  The wallpaper was put up very poorly and the room were in general bad condition.  I found out this time that the homeowners are getting ready to sell the house and are slowly fixing it up.  We are doing our part to help them.

I didn't take many pictures and these are the best that I can show.  The existing wallpaper in the dining room and living room were falling off and everything looked gloomy.  We stripped the wallpaper, repaired the old plaster walls, primed and painted the walls, painted the ceilings, and gave the trim a bath of fresh paint.

Dining Room before

Dining Room after
Living Room and Stairwell before
Living Room and Stairwell after